Australia
 New Zealand
 Singapore
 Malaysia
 Philippines
 Thailand
 Indonesia

Power BI and SharePoint integrated together
Last year as part of the Microsoft Power Platform: 2020 release wave 2, Microsoft quietly announced a new feature where users can create a Power BI report of the data contained in a SharePoint List (also known as a Microsoft List).
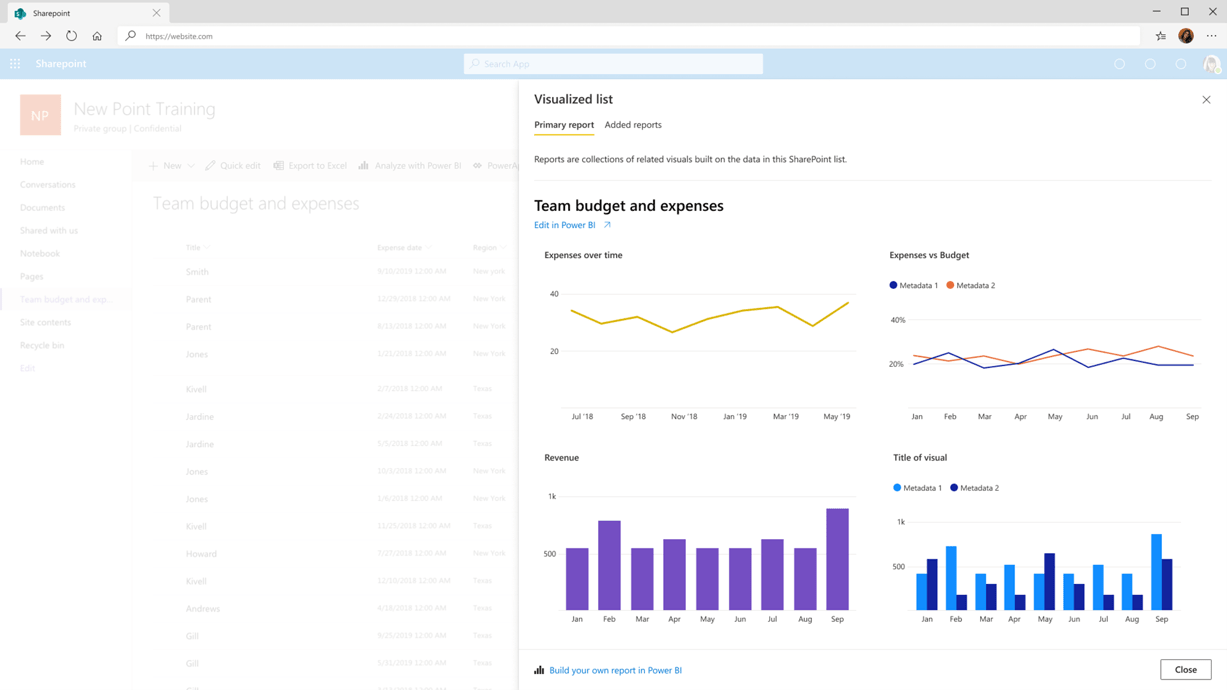
At the time not much information was shared, except for this image:

We had a lot of questions: how is this going to work? can we edit the report? do users need licenses?
So, how does it work?
Now after months of waiting, we now have more information about what it looks like and how it will work.
The ability to create this will be available through the soon to be released Integrate menu button and then selecting Visualize the list. Microsoft currently have these features listed for release in April/May 2021 - so keep an eye out for it as it may have already landed for you.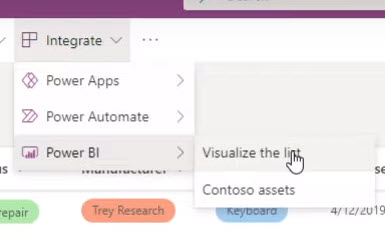
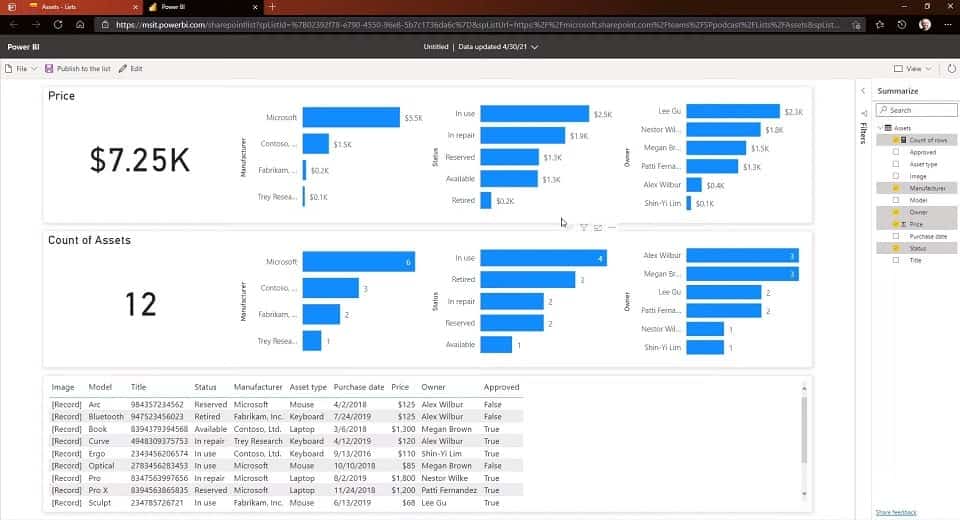
When ANY user clicks on Visualize the list a new window will open with an automatically populated report containing the data from the list (below is the default report that is generated):

Users have the ability to customise what columns are visualised through a Summarize pane on the right. On the top left menu we can choose between File, Publish to the list and Edit.
You might notice that this report isn't displayed in the Power BI service (i.e. app.powerbi.com) but in a separate minimalist version which only shows the report.
Do I need a Power BI subscription to Visualize the list?
Anyone is able to click Visualize the list and see the default report (as shown above).
If you want to edit the list you will need a Power BI Pro subscription. User who don't have a subscription will be asked if they would like to sign-up to a free 60-day trial - more about this below.
Once you click Edit, you are shown the familiar editing view, with the visualisations and fields panes available. Again you aren't taken to the Power BI service to do this - it's all through a minimalist version (everything you need and no filler around the edges).
Once Edited, you can then Publish the report to the list:

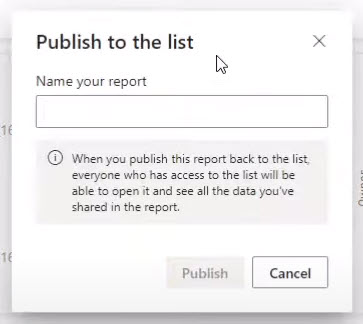
This will then allow other users to see the custom report through the Integrate>Power BI menu option. Note: only users with Power BI Pro subscription will be able to view the customised reports.
User without a Power BI Pro subscription will be able to view the default report (through the Visualize the list option) and they'll be able to see that custom reports are available. Clicking a custom report will prompt a sign-up for a free trial.
What should you do to prepare?
Consider your Power BI self-service sign-up and purchasing options if you don't want your users claiming a free trial. More information can be found here: Enable or disable self-service sign-up and purchasing
What do we think about the new feature?
It's another exciting way that users are going to be introduced to Power BI as a tool to visualise their data. The simple-to-use integration with Microsoft SharePoint Lists quickly demonstrates how visualisations help us understand our data, spot opportunities and share insights throughout our organisation and with customers.
We especially like that users without a Power BI Pro subscription can view the standard report and we like that they are offered the free trial.
For more experienced Power BI users, they will already know that connecting to a SharePoint Online List is a simple process using the free Power BI desktop application. However, for new users this will be a great introduction.
To Learn More, check out our Power BI Training Courses; available Australia wide.