Australia
 New Zealand
 Singapore
 Hong Kong
 Malaysia
 Philippines
 Thailand

Introduction
Power BI is the world’s leading, business intelligence-based data visualization tool, developed by Microsoft. Power BI is part of the power platform that includes very useful tools for app development, API integrations, business intelligence, and robotic process automation. Power BI does allow you to directly share reports with other users, but these reports can be limited in their scope and freshness of data.
You will need to create a PDF or Excel export of your current report and email it to your users. Obviously, this report will have data only until the point when the export was done. Moreover, if you wish to share reports with different relevant subsets of data to different users, it starts becoming tedious in Power BI. Power Automate can be used to automate Power BI workflows. Power Automate can add versatility and enhanced functionality to your Power BI reports; especially by triggering reports on events and sending custom reports to other users. With Power Automate, you can create automated workflows to get notifications, synchronize files, collect data, and more.
How to Create an Automated Report
The steps to create such an automated report are as follows:
-
Step 1
From the Visualizations pane, Select the Power Automate icon.
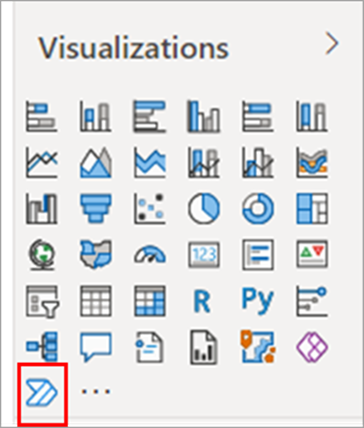
@Source:https://learn.microsoft.com
-
Step 2
Next, you can define a button that would initiate your Power Automate flow, inside Power BI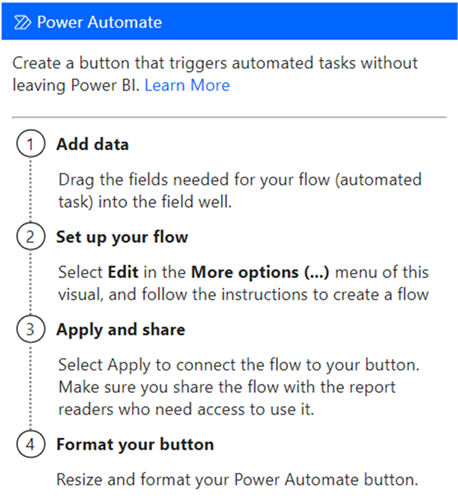
@Source:https://learn.microsoft.com
After giving the button its definitions, place it in an appropriate place in your report.
-
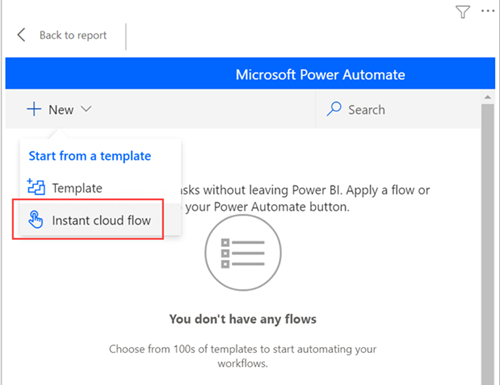
Step 3
Now let's add some action to the button. Click Edit on the top right, i.e. More options (...) > Edit to configure the button.  @Source:https://learn.microsoft.com
Once in Edit mode, you can create a new flow or assign an existing flow to your button.
Click New, and then > Instant cloud flow > New step
Now Power Automate will give you many actions to choose from.
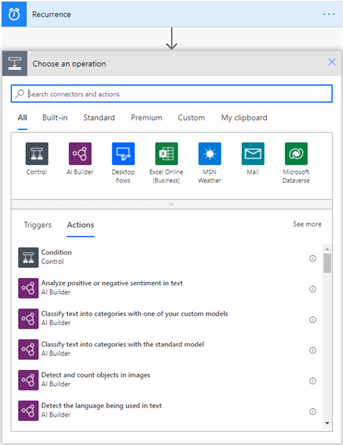
@Source:https://learn.microsoft.com
In the search box you can type in a keyword, like "data services" or "email" or "conditional flows", and all related available actions will appear.
Let's choose to create an item in a SharePoint list using the Region data field.
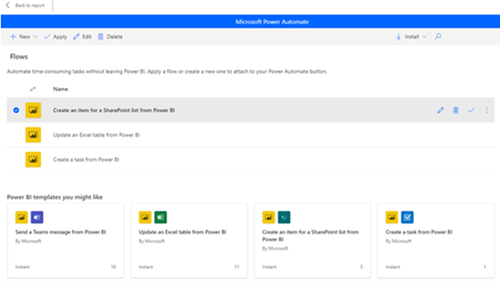
@Source:https://learn.microsoft.com
Name your flow and click "Save".
Your details page could look something like below
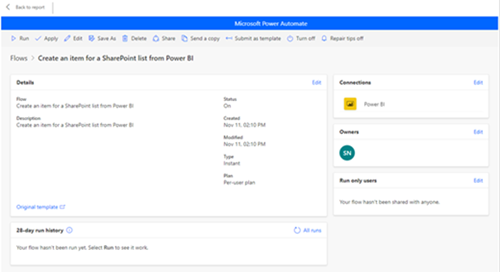
@Source:https://learn.microsoft.com
-
Step 4
You can further format the flow, specify alignment, fonts, fills, etc. -
Step 5
Now, we can test our flow
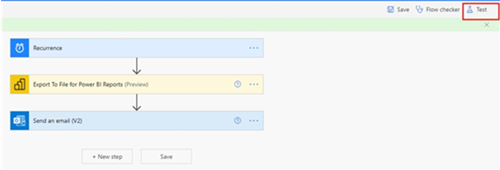
@Source:https://learn.microsoft.com
Before we share the button embedded in our Power BI report with other users, we need to test it.
select Back to report, press the Control button on your keyboard and select the newly created button.
Your Power BI button will now display the text "Run Flow".
Click it to start the trial run of your flow.
-
Step 6
To check the results of the test run, select the More commands (...) menu > Details
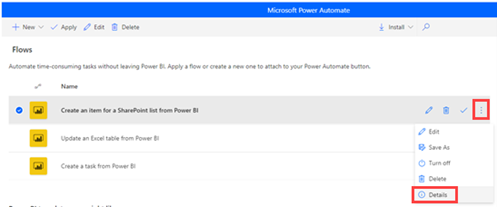
@Source:https://learn.microsoft.com
The test details screen will open up.
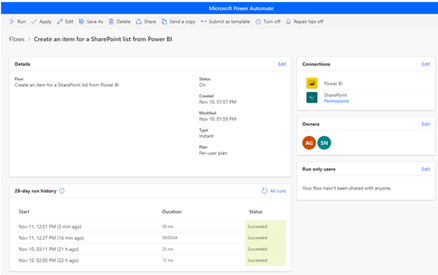
@Source:https://learn.microsoft.com
It shows your connections, i.e., the applications Power Automate used/connected to, in order to execute your flow. The run duration and run history, along with details of the current run.
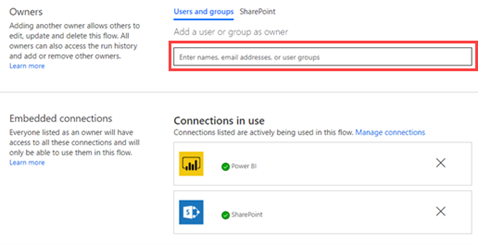
It will also show the owners (editors) of this button, and you can add/edit the owners list from here.
-
Step 7
Now we're all set to share this button with intended users.
Select Edit in the Run only user’s section.
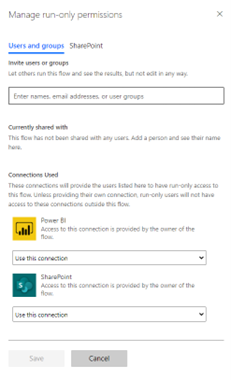
@Source:https://learn.microsoft.com
The above screen appears, and you can select users or groups you want to give run access to your button.
@Source:https://learn.microsoft.com
You can also give edit access to certain users if you want them to further sophisticate the button/flow.
Considerations and Limitations
- An Office 365 subscription which will allow you to use the standard connectors in Power Automate
- You need to have at least one workspace in your Power BI tenant backed by a reserved capacity, this reserved capacity will be used to run these automations
- The visual isn't supported for embedded analytics, neither is it supported in sovereign clouds
- You can only schedule a flow to run 8x per day when using the actions Refresh a dataset and refresh a dataflow. If you try to refresh your dataset/data flow more than 8x a day your flow will only run 8x, after that you will get an error and the flow won't run anymore
- Flows that have the actions Export to file for Power BI reports and Export to file for paginated reports won't run if the report is not stored in a premium capacity
Conclusion
We've discussed how to automate Power BI workflows and Power BI processes with the help of Power Automate.
We have successfully created a Power Automate visual for Power BI, edited, and tested the flow.
Also, we have demonstrated how to enhance and add functionality to Power BI reports, by using Power Automate.