Australia
 New Zealand
 Singapore
 Malaysia
 Philippines
 Thailand
 Indonesia
Excel by Microsoft is one of the best tools for your spreadsheet and Data Science requirements. It is widely used in various industries to organize and analyse data systematically and error-free. Today we will learn how to insert checkboxes in Excel.
To insert a checkbox in Excel, you must have the Developer tab enabled in your workbook.
Make Developer Tab visible
Our first step is to make the Developer Tab visible in the Excel ribbon.
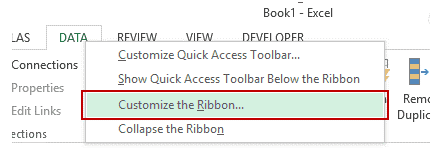
- Right-click the existing tabs in the Excel ribbon and click on Customise the Ribbon to open the dialogue box in Excel options.
- This will open the Excel Options dialog box and highlight the Customise the Ribbon option in the Navigation pane on the left. Within the Main Tabs pane on your right, check or click the Developer option.
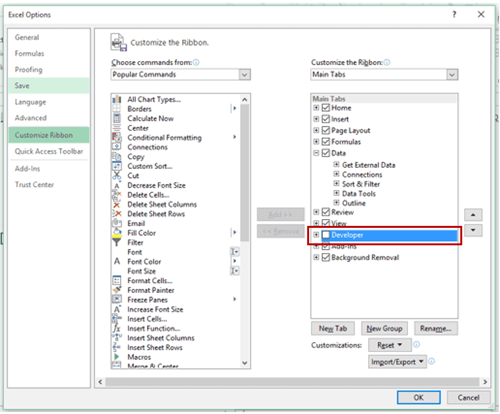
- Click the OK button to make your developer tab appear in one of the tabs in the Excel ribbon.
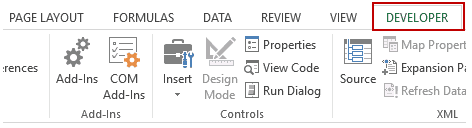
The developer Tab allows you to have more options to play around with.
Insert Checkbox in Excel
Now, we move on to insert a Checkbox in Excel:
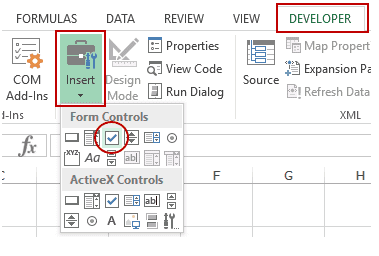
- Click Developer tab, then Controls, Insert, Form Controls, and finally Check Box.
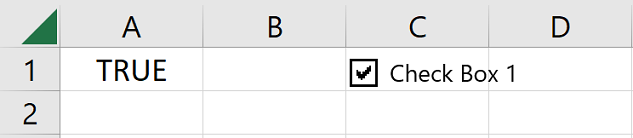
- Click cell C1 OR over A1. It will then line up with cell A1 and insert an Excel checkbox.
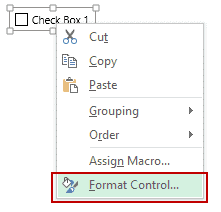
- Right-click on the check box to get a pop-up menu and click Format control to link your checkbox to any cell in MS Excel by right-clicking on the checkbox and selecting Format Control.
- You'll need to make some changes before clicking OK In the Format Control dialog box in the Control tab:
- Set Value option to ensure that your checkbox is checked by default whenever the workbook is opened.
- Set Cell Link to $A$1, which is the cell linked to your checkbox. It can be manually entered, or you can select the cell to get the reference.
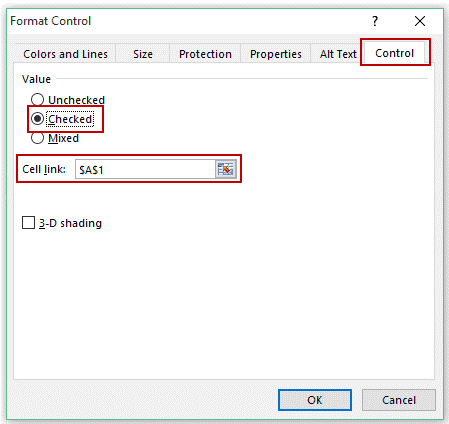
You can see that the checkbox is now linked to A1. Whenever we check the checkbox, it will show TRUE in A1, and when unchecked, it shows FALSE.
Tip: Save the sheet as Sample Checkbox, Then, either close it or add a new sheet for the next exercise.
Creating an Interactive To-Do List in Excel
Here is how we can make a To-do List on MS Excel.

To make a To-do List:
- Select Sheet 2 then list your activities in Cell A2:A7.
- Align them by selecting Page Layout > Arrange > Align > Align Left. Then, you can set the vertical spacing by clicking Layout > Arrange > Align > Distribute Vertically.
- Insert checkboxes as shown in previous topics and put them in B2:B7.
- Link checkboxes to E2:E7 by manually linking each checkbox, one by one. Remember that you'll need to test each one; otherwise. column E will be blank and give calculation errors.
- Enter the following formula in C2: =IF(E2," Complete","Pending") and drag the formula to C2:C7.
- Apply conditional formatting in C2:C7 for a green background colour and strike-through format when the value in the cell is Complete or Pending.
- Use this formula in H3: =COUNTIF($E$2:$E$7, TRUE) to count the total number of completed or DONE tasks.
- Use the following formula in H4 to show the percentage of tasks completed: =COUNTIF($E$2:$E$7, TRUE)/COUNTIF($E$2:$E$7,"<>").
To work around this, Download the checklist.
Creating a Dynamic Chart in Excel
Here is how we make a dynamic chart
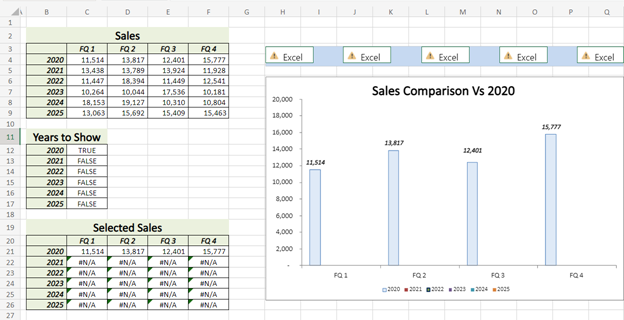
- Link the checkbox above the chart to cells C13-C17.
- When we check the checkbox for 2013, the value of C7 becomes TRUE, and in the case of 2014, C8 becomes TRUE.
- C11 to F13 contain data used in the chart. The data for 2013 and 2014 depends on the linked cell, i.e., C7 and C8. If C7 is TRUE, the values in C11:F11 is true; else, else, we get a #N/A error.
- Based on what is checked, we see data on the chart accordingly.
Get the dynamic chart template here.
How to Insert Multiple Checkboxes in Excel
To insert multiple checkboxes in the same worksheet:
Inserting a Checkbox using the Developer Tab
Go to the Developer Tab, then Controls, then to Insert, Form Controls, and Check Box. Click anywhere in the worksheet to insert a new checkbox. Repeat the steps to insert multiple checkboxes in MS Excel. You need to link the checkboxes manually to link the checkboxes. Caption names for each checkbox will be different.
Copy Pasting the Checkbox
Select an existing checkbox by holding down the CTRL key and clicking SELECT. Copy and then paste it or the keyboard shortcut (CTRL) + D, which is the Duplicate command. The checkboxes copied are linked to the same cell as that of the original checkbox and require us to change the cell link for each checkbox manually to change the cell link for each checkbox. The caption names of all the copied checkboxes are the same. However, the back-end name would be different (as these are separate objects).
Drag and Fill Cells with Checkbox
Drag all checkboxes and fill the handle down to create copies of the checkbox. The caption names of all the new checkboxes are the same, but the backend names would be different (as these are separate objects). All these checkboxes would be linked to the same cell (if you linked the first one) and require us to change the link of all these one by one manually to manually change the link of all these one by one.
Deleting the Checkbox in Excel
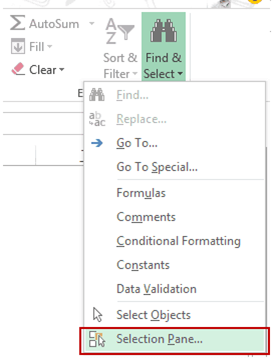
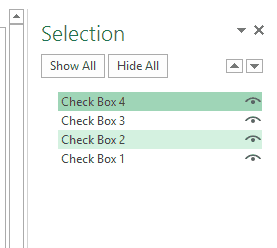
To delete a single checkbox, select it then press the Delete key. To select a checkbox, hold the Control key and press the left mouse button. To delete multiple checkboxes, Hold the Control key and select those you want to delete and press the delete key. If you have multiple checkboxes scattered in your worksheet, get a list of all the checkboxes and delete them in one go by going to Home, Editing, Find & Select, and Selection Pane.
This opens a Selection Pane that lists all the objects on the worksheet (including checkboxes, shapes, and charts).
- Select the checkboxes you want to delete. To select multiple, hold the control key while selecting and press the delete key. The names of the checkboxes will be the backend names, not caption names. The selection pane displays all the objects of the active worksheet only
Fix Checkbox Position in Excel
A common issue when using shapes and objects in MS Excel is that resizing cells or hiding/deleting rows/columns also affects the shapes and checkboxes.
To stop the checkbox from moving around on resize or delete, left-click on the checkbox and click Format.
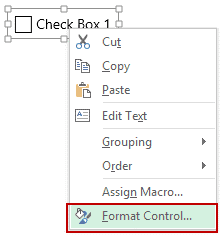
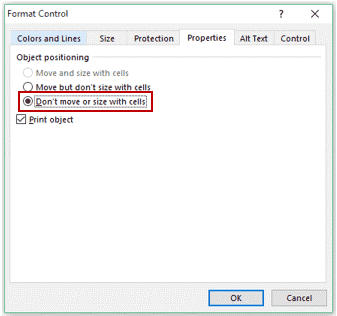
Select the properties tab in the Format Control dialog box.
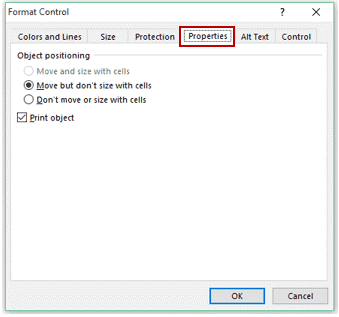
Within Object Positioning, in the properties tab, select the "Don't move or size with cells" option and click OK. Now resizing should not affect anything on your checkboxes.
Caption Name vs. Name
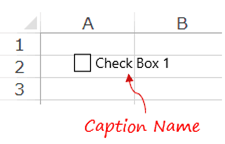
You can see a name in front of the Box like Check Box 1 or Check Box 2 when you insert a checkbox in MS Excel. The text in front of the Box is the caption name of the check box. It can be edited by right-clicking and selecting the Edit Text option.
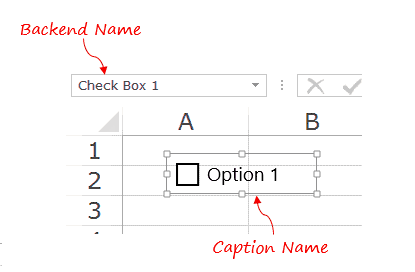
Even if we see new text in the backend, Excel still refers to it as Check Box 1. If we select it and look at the Name Box field, we will see the name Excel uses for the checkbox at the backend. We can change the backend name by selecting the checkbox in the worksheet and then typing the name in the name box, the naming rules being the same as that of object names.
Conclusion
MS Excel provides many amazing tools for Data Scientists, Accountants, and business owners. Today we learned how to use checkboxes in MS Excel, and we can apply it in making forms, To Do lists, Team management, and so much more. To learn more about MS Excel, check out our Excel courses and achieve expertise with the help of our trainers.
Feel free to enrol in our Beginner, Intermediate, Advanced, and Expert-level courses.