Australia
 New Zealand
 Singapore
 Hong Kong
 Malaysia
 Philippines
 Thailand

Looking to edit videos like a pro? This concise Premiere Pro tutorial is your gateway to understanding and mastering Adobe Premiere Pro’s powerful editing arsenal. Whether you’re assembling your first clip, adjusting colors, or exporting a cinematic masterpiece, we’ve distilled key steps into a clear, easy-to-follow guide.
What is the Best Way to Learn Adobe Premiere Pro?
It's best to learn Adobe Premiere from the developers who made the application. Adobe offers training, such as perhaps a YouTube tutorial for beginners and expert users. This series covers several aspects of this program including transferring Premiere from other applications, how to export media, how to add animations and effects, and how to make graphics & titles (e.g. Adobe's website offers a simple to-navigate page that separates beginners and intermediate materials, as well as offers a comprehensive introduction to editing applications).
Beyond the basic tutorials, Adobe's resources delve into the intricacies of the software, guiding users through advanced features and providing tips for optimizing workflow. These resources are invaluable for those looking to refine their skills and push the boundaries of their creative potential. Additionally, the community forums and support provided by Adobe can answer specific questions and offer personalized advice, making the learning process a collaborative and dynamic experience.
It's best to learn Adobe Premiere from the developers who made the application. Adobe offers training, such as perhaps a YouTube tutorial for beginners and expert users. Another excellent way to master Adobe Premiere Pro is to learn from Nexacu's trainers through their comprehensive courses, which provide structured guidance tailored to your needs.
Diving Into Premiere Pro: A Beginner's Walkthrough

Recognized for its robust capabilities, Adobe Premiere requires you to Familiarize yourself with its interface—the canvas where your creative visions will come to life, and where media management and project initiation take place.
Through our tailored Adobe Premiere Pro tutorials, gaining mastery over Premiere Pro becomes a seamless experience. Step by step, each pro tutorial is designed to help you confidently navigate through all aspects of Adobe’s premier video editing software.
Starting a New Project in Premiere Pro
Visualizeyourself as an artist poised to begin a brand new piece of art. That’s the sensation when you embark on creating and developing a new project in Premiere Pro! By selecting File > New >Project, you initiate a dialogue box where you can assign your project’s name and determine its save location.
To make preparation more efficient, Premiere Pro provides various project templates tailored for different kinds of productions such as broadcast or social media endeavours, allowing you to develop and improve new workflows with ease.
Ensure that your project has a distinct name and select an easily accessible save destination on your computer to facilitate smooth retrieval and management. So prepare yourself—it’s time to blend those colors!
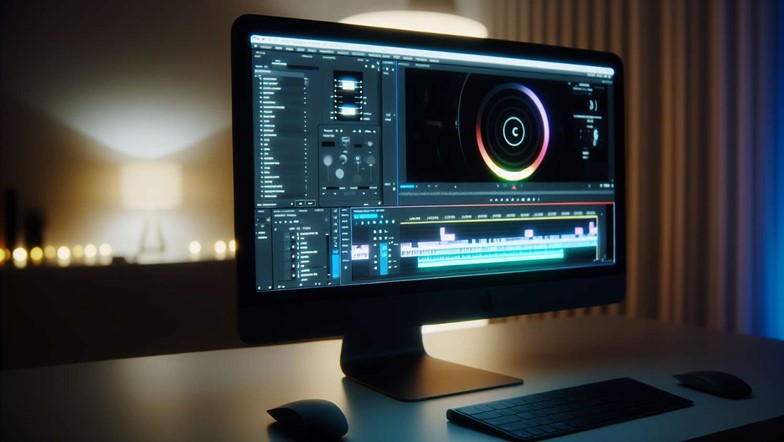
Navigating the Premiere Pro Interface
Enter the control center of Adobe Premiere Pro! Initially, it might appear complex, but rest assured that each segment of this interface is designed with a distinct function. Within your workspace, you’ll find crucial panels such as:
-
The Project panel to manage your media files
-
The Source Monitor for clip previews
-
The Program Monitor dedicated to viewing sequences
-
The Audio Track Mixer for sound control
Adobe Premiere provides specialized workspaces crafted specifically for various post-production processes including:
-
Assembly procedures
-
Editing workflows
-
Colour grading tasks
-
Effects application
-
Audio fine-tuning
When you have these tools at your fingertips, you can realize the endless creative possibilities that Adobe Premiere Pro offers for your video editing projects!
Essential Settings Before You Begin
Before we begin, it’s critical to adjust our settings in Premiere Pro for peak performance—think of this as your pre-flight check. Access the preferences panel by navigating to Edit > Preferences on Windows or Premiere Pro > Preferences on macOS and tailor features including the interface design and media cache, much like how websites use cookies and data to enhance user experience.
Ensure that you select ASIO drivers for enhanced performance and reduced latency during playback and recording if you’re using Windows. For macOS users, opt for CoreAudio drivers instead.
Importing and Organizing Your Media

We now introduce our essential companions—the media files. This step constitutes the core of your project in Premiere Pro. The software equips you with organizational tools such as bins and labels to manage your media efficiently, much like packing items into suitcases for convenient retrieval. Adobe Premier offers you flexible viewing options for these files through List, Icon, and Freeform views.
Now, we advance to the next stage of importing our media into Premiere Pro. This is why we have this Adobe Premiere Pro tutorial in the first place.
Importing Video and Audio Clips
Sail through the security of Adobe Premiere Pro with these simple steps:
-
Use the Media Browser panel in Adobe Premiere to import your video and audio clips. Consider this panel as an X-ray machine, giving you a sneak peek into your clips before fully importing them.
-
To maintain organization within your project, create bins in the Project panel.
-
Within Premiere Pro, you have the ability to rename individual clips without altering their original file names.
By following these guidelines, maneuvering around your media will be both smooth and efficient. Also, by meticulously tracking outages and guarding against issues in advance within Premiere Pro, you ensure that your project remains orderly and protected from potential problems.
Building Your Timeline
With your Timeline, you can orchestrate your sequences. Within a single project, it’s possible to create numerous sequences, affording you ample versatility in structuring various parts of your video endeavour.
Editing Techniques to Transform Your Videos
Now we begin converting our unedited footage into an engaging narrative. During this stage, your task is to incorporate video clips into your timelines and utilize the Lumetri Color panel to give your footage a polished appearance.
This is the moment for you to master using this software with both accuracy and inventive flair.
Making Precise Cuts and Edits
Video editing requires meticulous care, and Premiere Pro offers an arsenal of instruments including the Ripple Edit and Rolling Edit, among others, to assist in making exact adjustments. Equipped with the appropriate tool complemented by proficiency in keyboard shortcuts, you will swiftly navigate through your video tasks within Premiere Pro!
Adding Transitions and Effects
Your command center within Premiere Pro is the Effects panel, which navigates you through a variety of effects and transitions that include:
-
Cross dissolves
-
Wipes
-
Zooms
-
Fades
-
Colour effects
Incorporating these can refine your video’s progression or infuse it with visual allure.
Enhancing Your Videos with Titles and Graphics
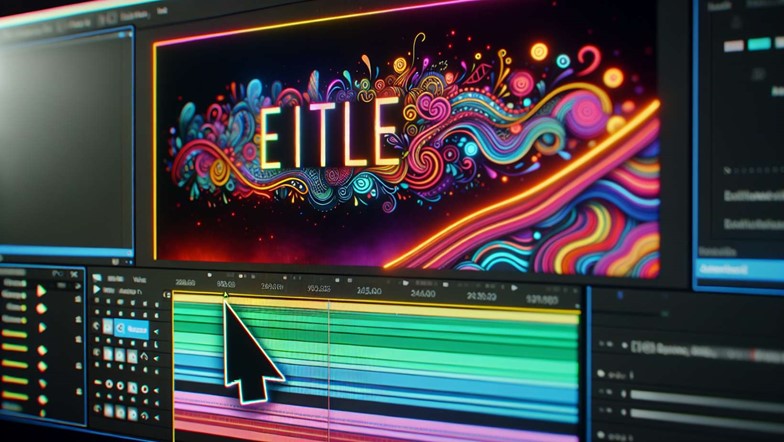
While we navigate the expanse of Adobe Premiere Pro, it’s time to elevate our video projects by incorporating titles and graphics. To add these elements in Premiere, you have the option of utilizing either the Legacy Titler or tapping into the capabilities of the Essential Graphics panel.
Creating Engaging Titles
To insert titles, employ the Type tool alongside the Essential Graphics panel for crafting tailored content and advertisements. You can modify text size and shape layers right within the Program Monitor, plus you have the flexibility to lengthen or reduce title durations on your timeline as required.
Subsequently, let’s breathe life into our project by adding dynamic movement.
Incorporating Motion Graphics
It's time to infuse your video with dynamic motion and supplemental b-roll, all the while monitoring engagement and site statistics! Use the Essential Graphics panel to navigate through and handle your Motion Graphics templates efficiently.
Colour Correction and Grading in Premiere Pro CC

With Premiere Pro’s Lumetri Color panel at your disposal, you’re equipped with a comprehensive suite of tools that cater for both basic tweaks and sophisticated colour modifications.
Basic Colour Correction Tools
Basic colour correction instruments allow you to tweak exposure, contrast, and additional elements so that your video becomes easier on the eyes. This includes making adjustments suitable for viewers of all ages if necessary.
Consider the Lumetri Color panel as your dashboard for navigating through both technical and artistic colour enhancements in your videos.
Advanced Color Grading
This feature is depending on your settings. Consider advanced colour grading as painting a stunning sunset ready to be admired by art lovers. Apply Curves, Colour Wheels, and HSL Secondary to meticulously adjust colors and amplify the emotional impact of each frame in your video.
Exporting Your Final Video Masterpiece
Choosing the Right Export Settings
You must account for the end-use of your video, as each platform could demand unique codecs or formats. Fortunately, with built-in presets tailored for platforms such as YouTube and Vimeo, Premiere Pro simplifies this process by instantly configuring the necessary settings. As you finalize your project, it's like ensuring you've taken all the necessary precautions to track outages and protect against spam, fraud, and abuse.
Along the way, don't forget to measure audience engagement and site statistics to understand how our services can be optimised and enjoyed to their fullest potential.
Stay focused. We are approaching the conclusion of our project!
Using Adobe Media Encoder for Efficient Exports
As we close in on project completion, it’s crucial to guarantee a seamless finalization using Adobe Media Encoder. This utility is proficient at batch encoding, enabling the concurrent exportation of various files that may require diverse file formats.
In wrapping up our efforts, let’s collaborate effectively to deliver and maintain Google services at optimal performance!
Leveraging Premiere Pro's Advanced Features
Video editing is an expansive terrain waiting to be explored by those interested. We started with fundamental concepts and progressed to sophisticated capabilities such as multi-camera and three-point editing.
Multi-Camera Editing
Multi-camera editing lets you effortlessly synchronize and edit videos shot from various cameras, offering a comprehensive perspective on your work.
Three-Point Editing for Fast Pacing
This method requires selecting a beginning and concluding mark on both your project’s timeline as well as on the source footage, enabling exact positioning of clips. It proves particularly useful in high-speed editing situations that require swift completion.
If you're looking to further hone your skills or need structured guidance as you embark on your video editing journey, consider Nexacu for in-depth training tailored to your needs. With a variety of courses, Nexacu can be your co-pilot in learning Adobe Premiere Pro. So, take that step today and embark on your own exciting video editing journey. The sky’s the limit, and with Nexacu's training, you're cleared for takeoff!
Frequently Asked Questions
Is Premiere Pro easy to learn?
For those new to video editing and unfamiliar with Adobe Creative Cloud, getting the hang of Premiere Pro may present some initial challenges. Having a foundational grasp of basic computer proficiency and video editing vocabulary is crucial before embarking on mastering Premiere Pro.
Is Premiere Pro easier than Photoshop?
Premiere Pro is often viewed as more user-friendly than Photoshop, which can make it a preferable choice for video editing tasks.
Hence, for those who are just beginning their journey in video editing, Premiere Pro might present itself as an easier option!
Is Adobe Premiere enough for video editing?
Certainly, Adobe Premiere Pro sufficiently caters to video editing needs. It is equipped with excellent capabilities for editing both video and audio content, and it's particularly adept at creating content tailored for platforms like YouTube homepage and tailored ads.
Transitioning to Premiere Pro is a seamless process and definitely justifiable!